|
The C64DTV
Finally my C64DTV have arrived.
As I live in Europe the C64DTV it's hard to get a C64DTV. QVC
home-shopping does not ship outside the US or Canada. I was quite lucky
to pass the internet site of
www.americangoodies.com. I order the package of two C64DTV's and
they arrived last week. (one to play with, one to hack)
It's a pity that these are NTSC as my tv and codework used to run
on a PAL machine, but hey, it's a gadget or not.
Hack the C64DTV
Thought of playing the games or demo's you want on the C64DTV? Here
is an explanation how to hack your C64DTV. After this "Hack your C64DTV
for dummies" it's all possible. Check this
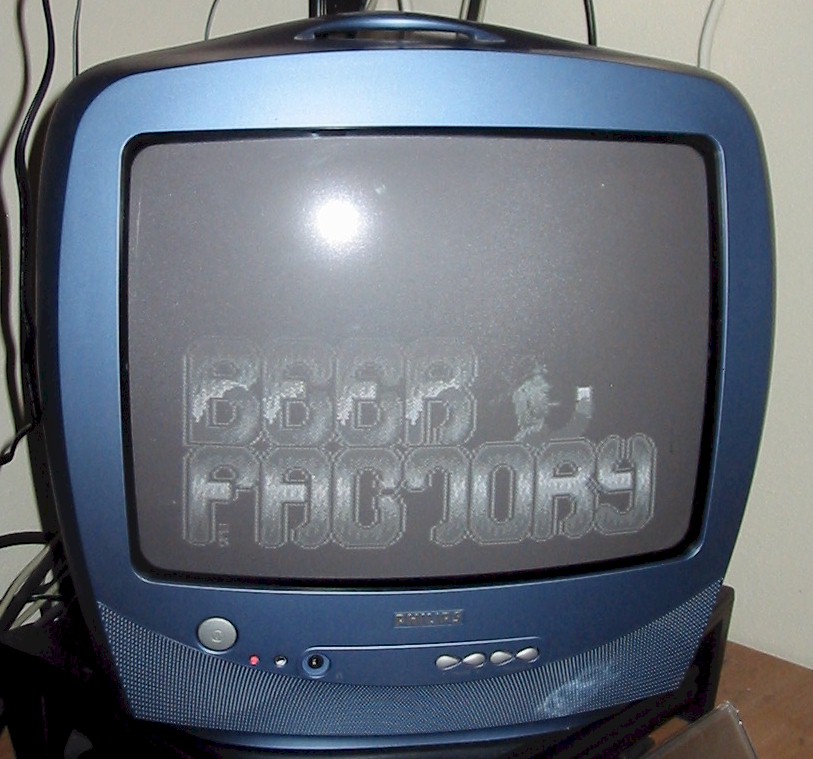
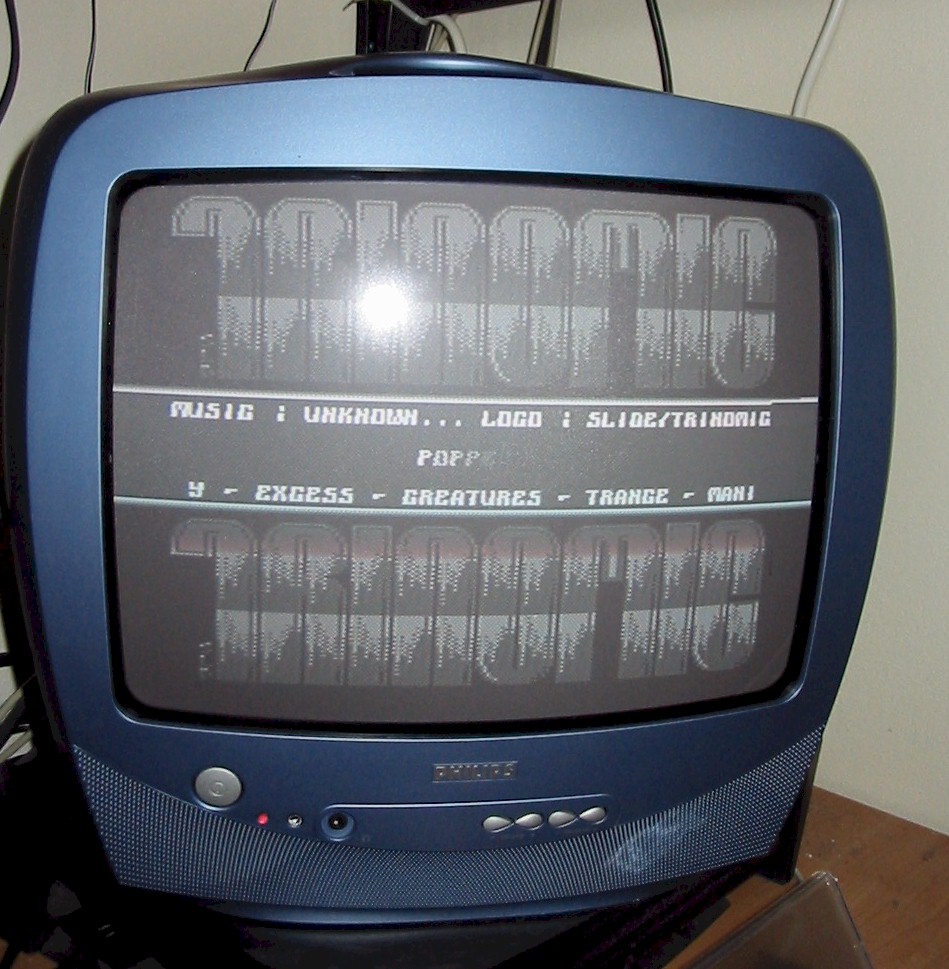
The demo "The Beer Factory" from Trinomic, and a small Cracktro i
did for Trinomic running on a C64DTV
Here is how to do it in three little steps:
An external power
source (for the time being an old computer power supply)
A PS/2 connector to attach a
standard PC keyboard
A DIN connector to attach a disk drive
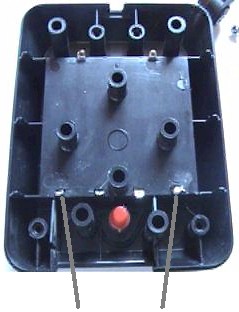
Connecting an external power source
| Un-Solder the red and black
wires from the points below |
 |
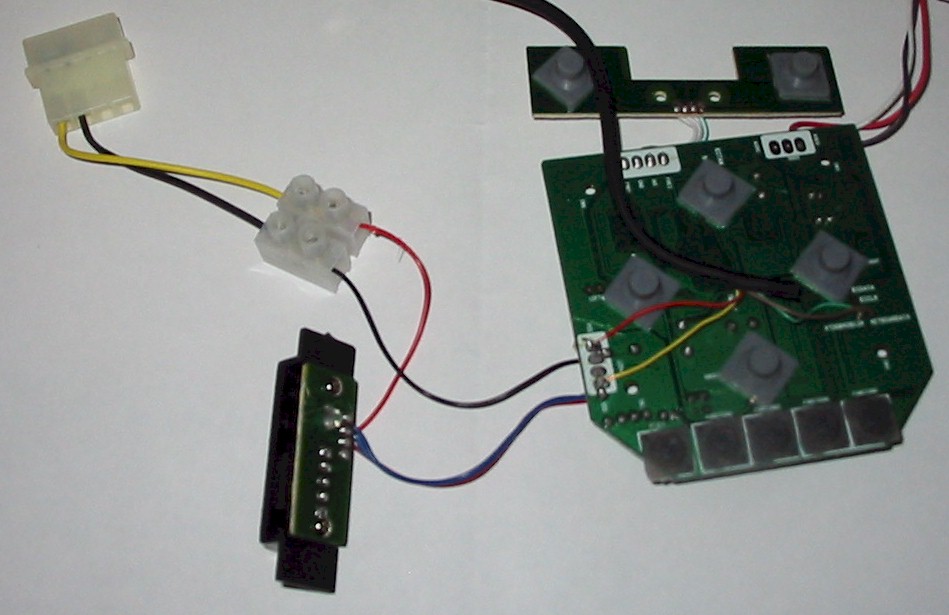
| I had the connector below
lying around. Ideal for connecting the C64DTV to a standard
computer power supply. (yellow line is +5V, black line is
GROUND) |
 |
| I connected the yellow line to
the red line from the C64DTV and the black one to the black one |
 |
| Connect it to a PC PSU, turn
the PSU on and turn the C64DTV on. The red led should light up
and the C64DTV should function as normal. |
|
Connecting a
PS/2 keyboard
| From our local dump-store I
bought the PCI bracket below. I want to use the PS/2 connector. |
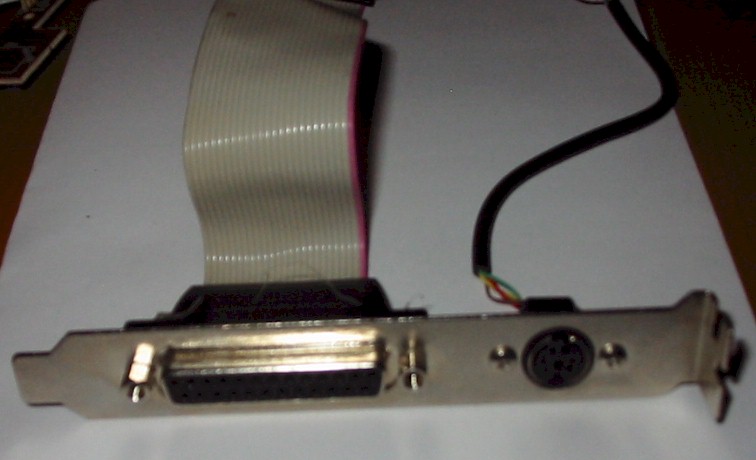 |
| Disassembled it looks like
this |
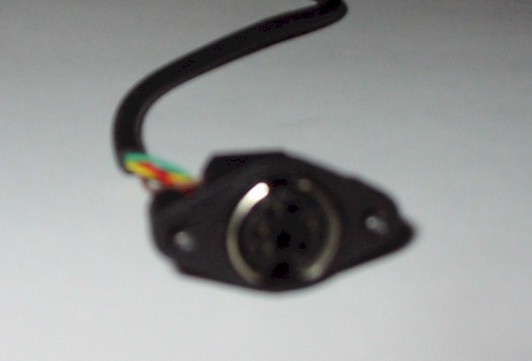 |
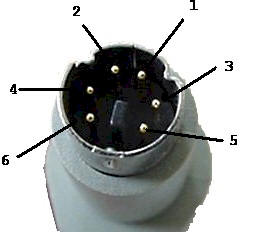
| Let's see witch wires we have
to use. We only have to use four
of them:
PIN1
DATA
PIN3
GROUND
PIN4
+5V
PIN5
CLOCK
Check the colors of the wires yourself. Could change per
connector you use. |
 |
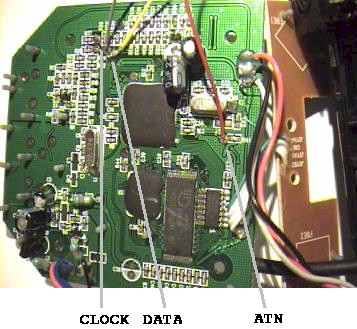
| Solder DATA en CLOCK on the
following places. (These points are near the "Right" of the
joystick) |
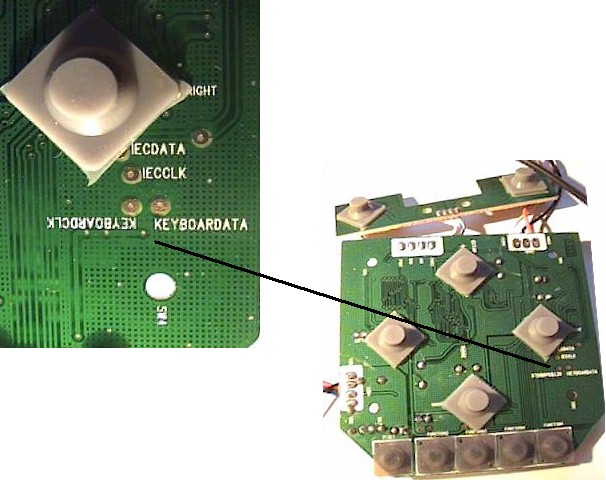 |
| Now solder the GROUND and +5V
on the following places |
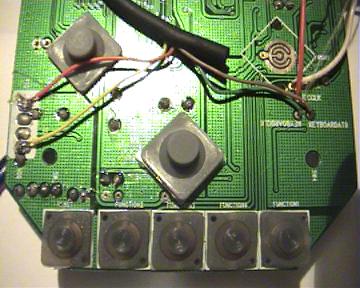 |
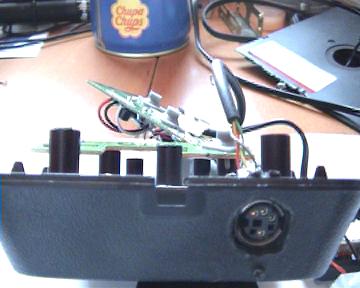
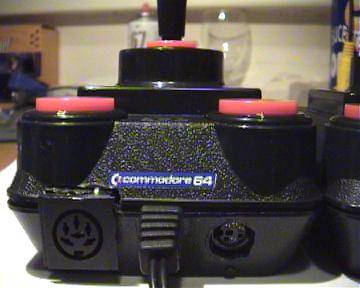
| Give the PS/2 connector a nice
place in the joystick |
 |
| Then plug in a standard PS/2
keyboard. Fire up your C64DTV holding the "K" (shift+k) and you
should enter the C64 Basic screen.
If this does not happen, hold the keys down
and press the reset button of your C64DTV.
If it still doesn't work check your wires. |
|
Connecting a disk
drive
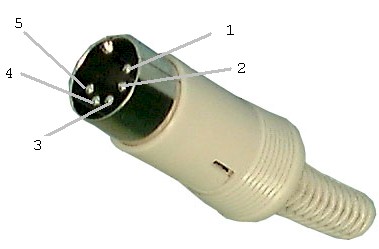
| I use a DIN connector for
this. You need four wires PIN2
GROUND
PIN3
IECTAN
PIN4
IECCLK
PIN5
IECDATA
|
 |
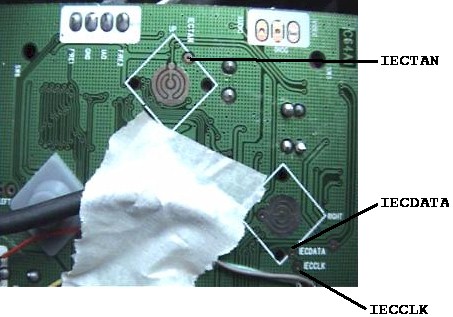
| At this point i use the DIN
connector of a very old C64 mainboard.
When i got a better solution and a way to
get the connector into the C64DTV then i will post better
pictures.
Solder the cables at the following points.
For GROUND, I used the same point as connecting the keyboard
|
 |
| After soldering it will look
like this. I use black for GROUND, but I use the same GROUND as
for the PS/2 connector |
 |
| After fiddling around with the
wires and the connector it looks like this (just have to find
some glue to keep the connectors on the C64DTV |
 |
|